M365 Business Premium: Initial Tenant Configuration and Custom Domain Setup
Table of Contents
First Look at the Tenant
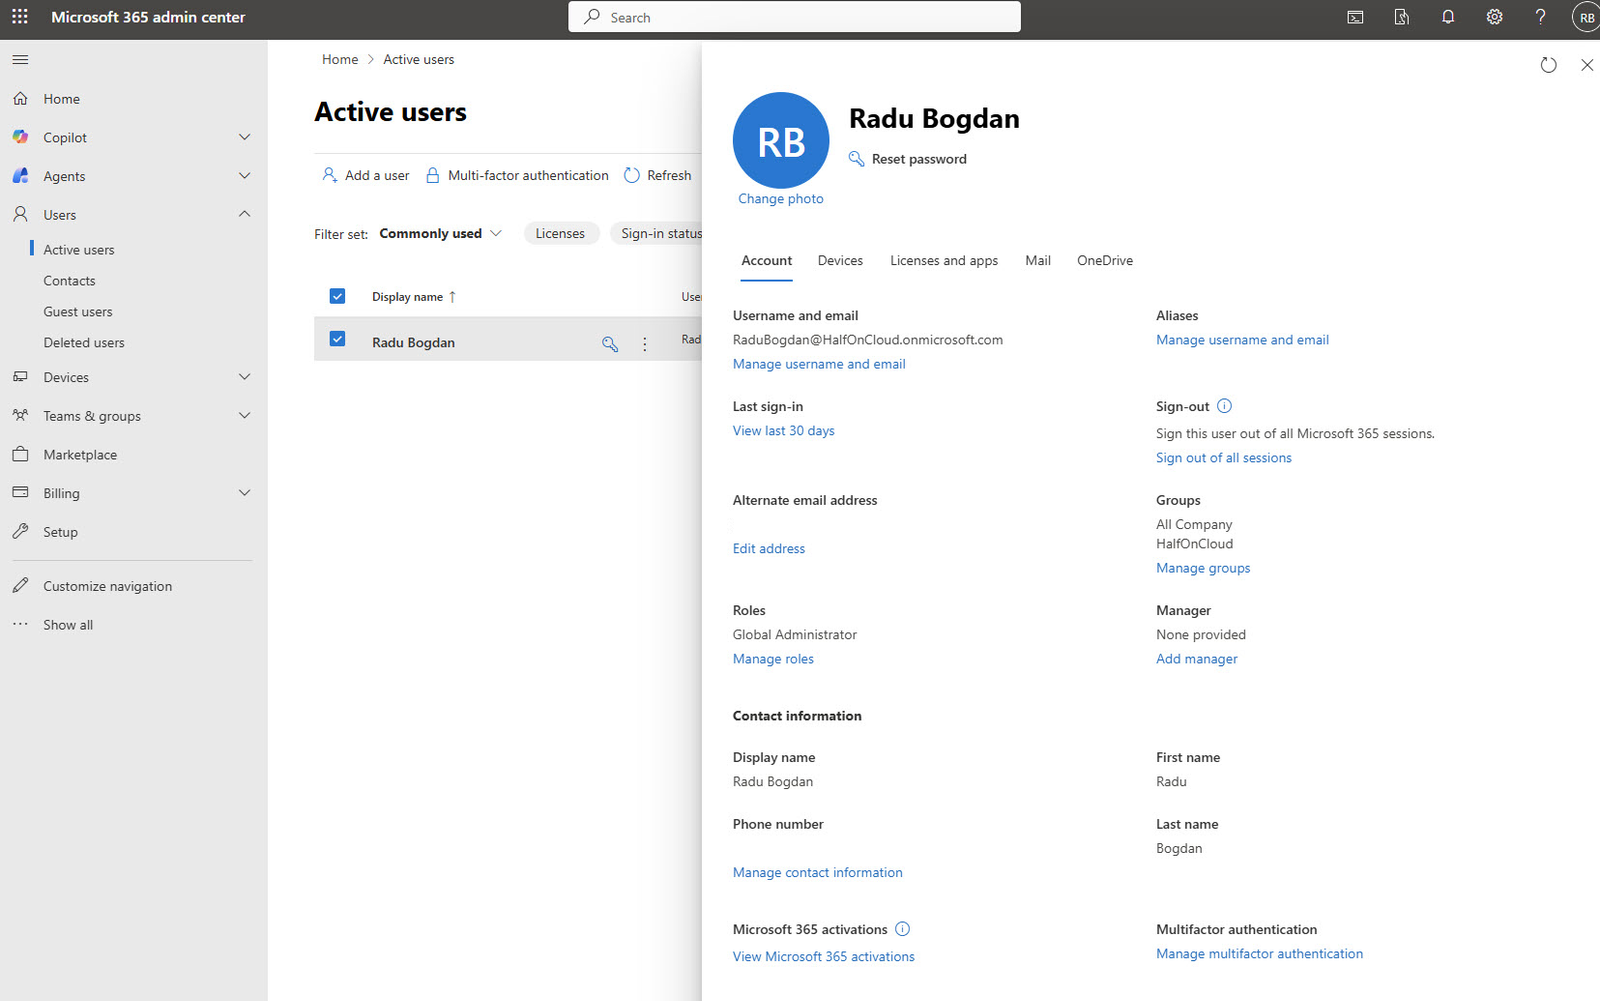
After completing the purchase and the initial MFA setup, you land in the Microsoft 365 admin center. First thing I did here was to check my Admin account under Users > Active users.
Everything looks correct: Global Administrator role assigned, MFA configured and the default HalfOnCloud.onmicrosoft.com domain attached to my account.
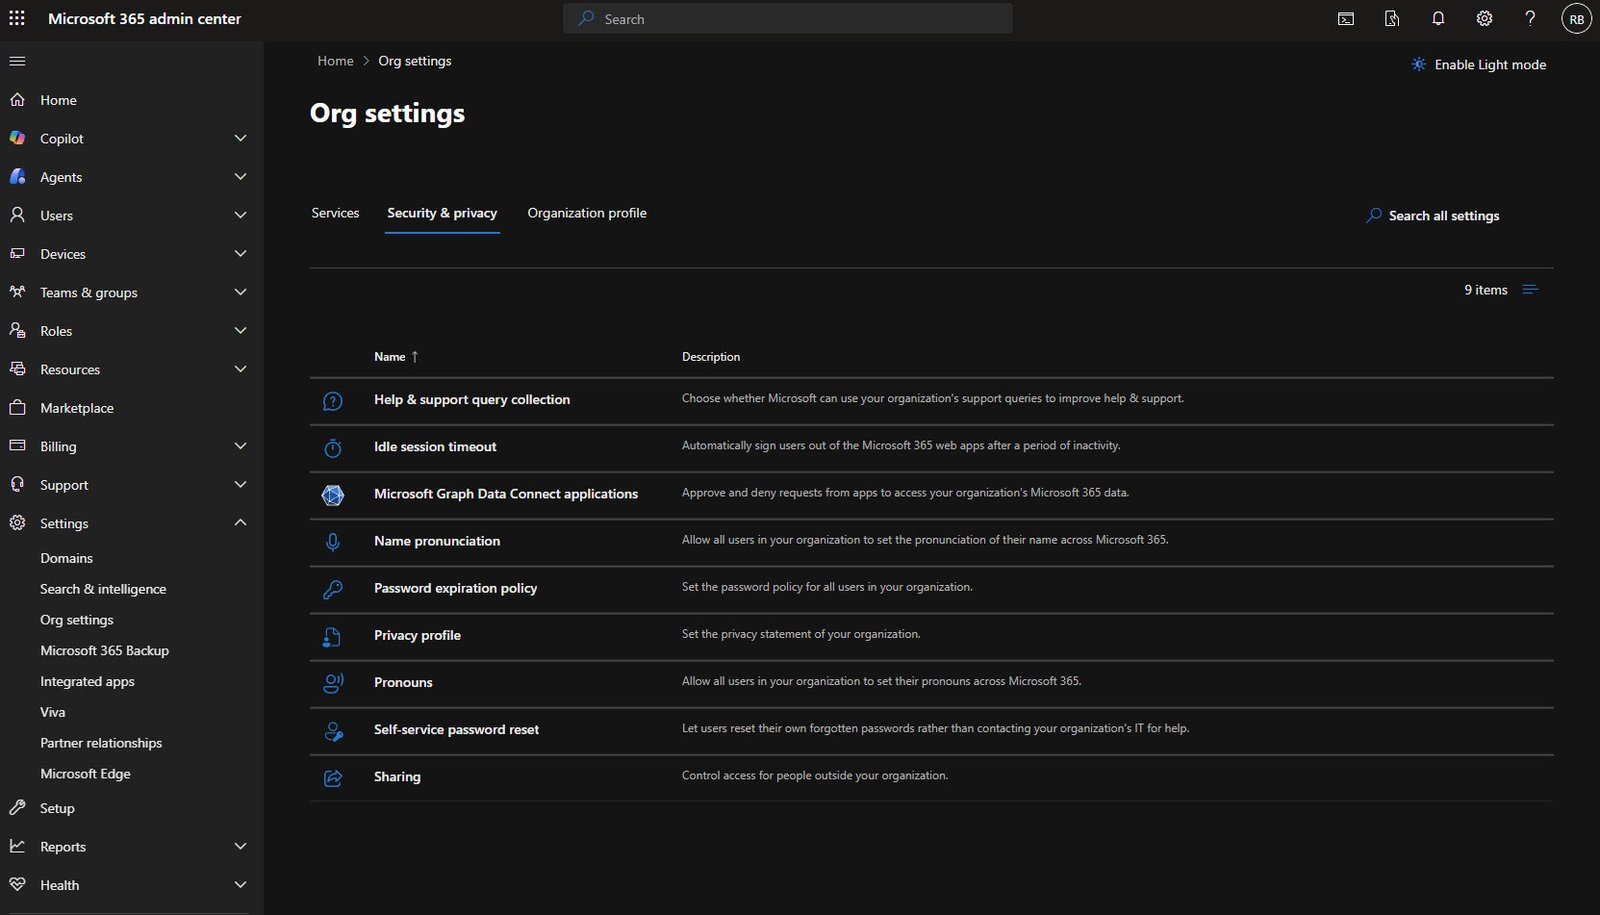
Organization Settings
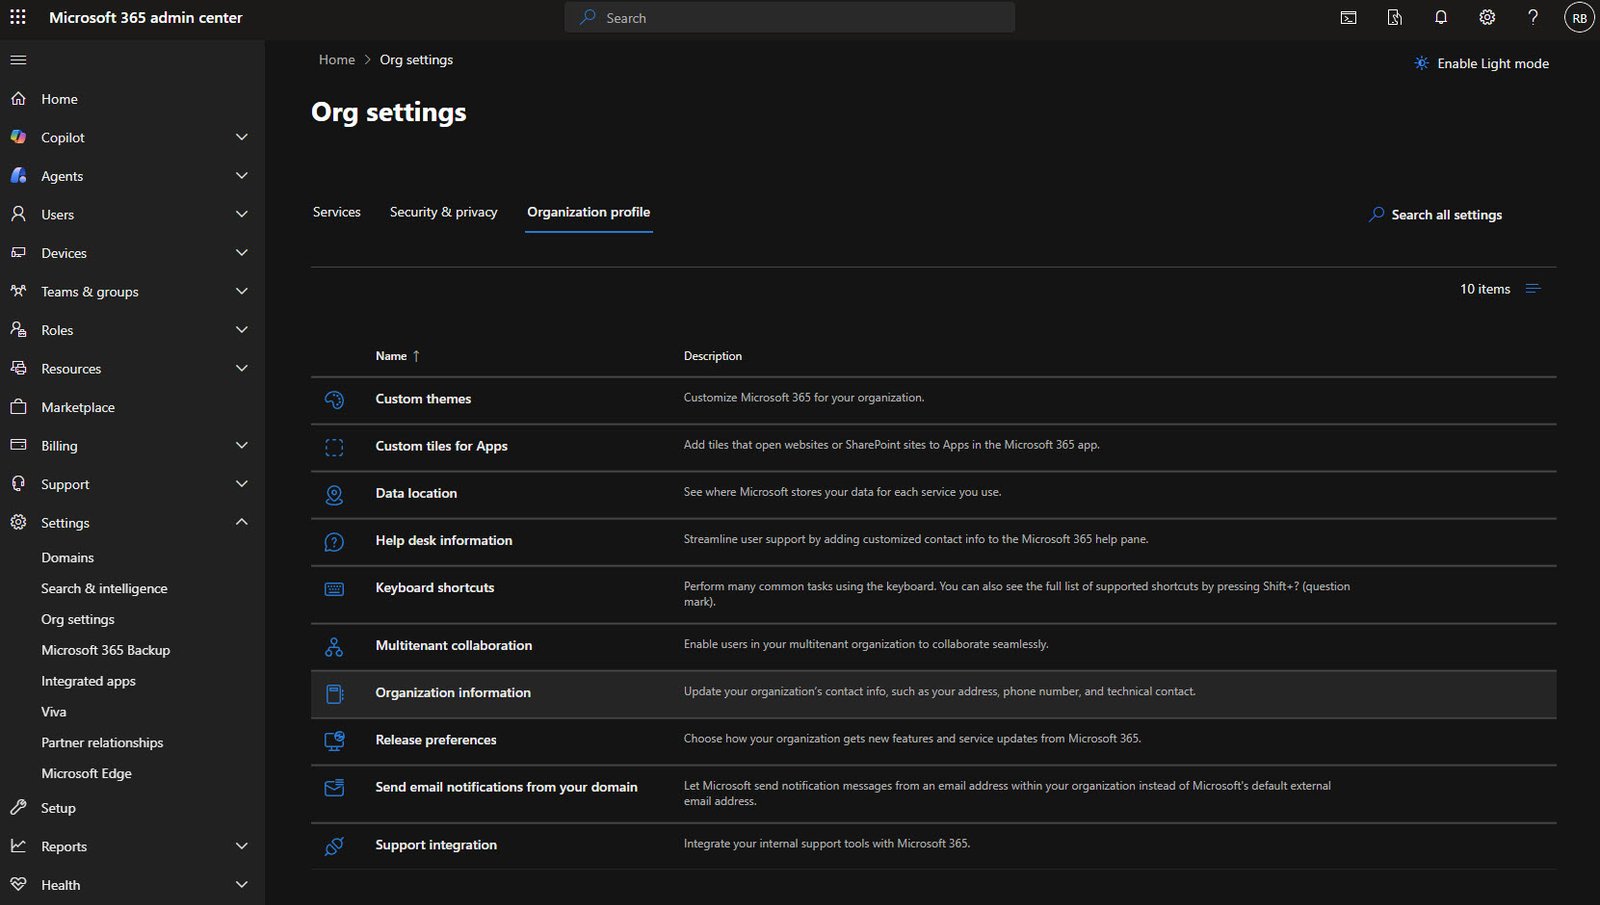
Next stop is Settings > Org settings. This is where you configure tenant-wide options.
There are three tabs here: Services, Security & privacy and Organization profile.
I started with Organization profile to set the basics.
Organization Information
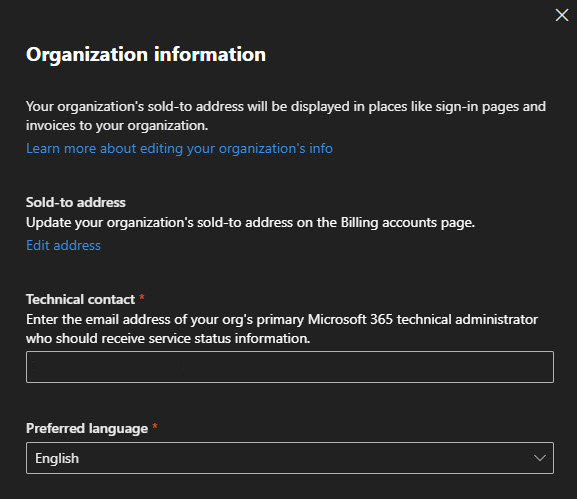
Under Organization information, you set your technical contact. This is the email address that receives service notifications from Microsoft.
Important to set this to someone who actually monitors emails!
The sold-to address is pulled from your billing info, so that’s already filled in from the purchase (I had to remove mine due to security concerns)
Release Preferences
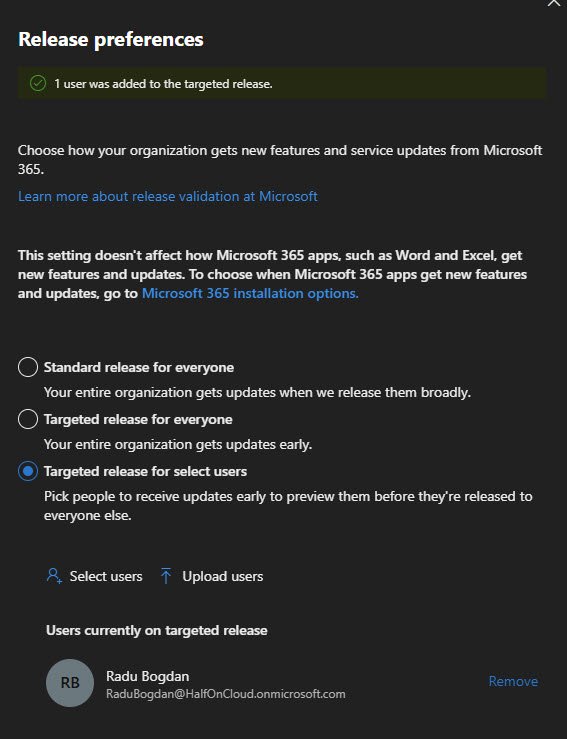
This one matters if you want early access to new features. Microsoft offers three options:
- Standard release - Features roll out when Microsoft considers them ready for everyone
- Targeted release for everyone - Your whole tenant gets features early
- Targeted release for select users - Only specific users get early features
I went with targeted release for select users and added my admin account. This way I can test new features before they hit the rest of the organization. In a production environment, you’d add your IT team here.
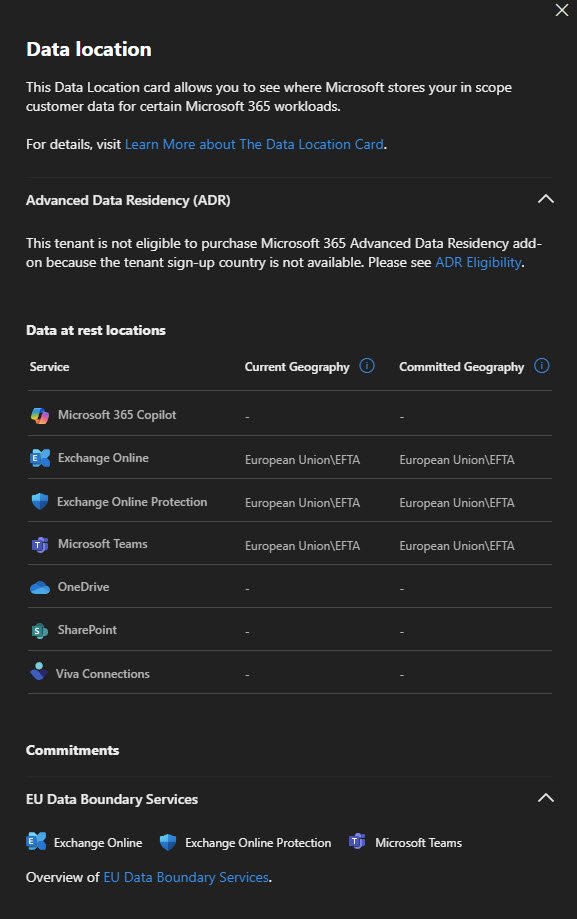
Data Location
Worth checking where Microsoft stores your data. Since I’m in Europe, my tenant data sits in European Union/EFTA datacenters for Exchange, Teams and SharePoint.
Note the “Advanced Data Residency” section is a paid add-on for stricter data residency controls.
Not available in all regions and not necessary for most small businesses!
Security and Privacy Settings
Switching to the Security & privacy tab.
This is where you find password policies, session timeouts and other security-related tenant settings.
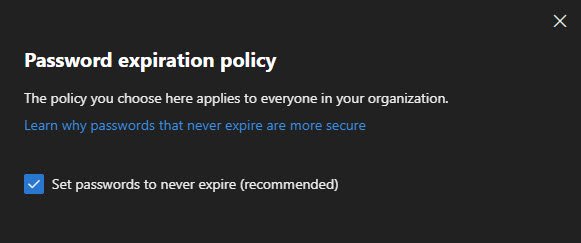
Password Expiration Policy
Microsoft now recommends setting passwords to never expire which might sound counterintuitive, but the reasoning is solid: forced password changes lead to users picking weaker passwords or just incrementing a number at the end.
Combined with MFA (which I’ve already set up), non-expiring passwords are actually more secure than the old “change every 90 days” approach.
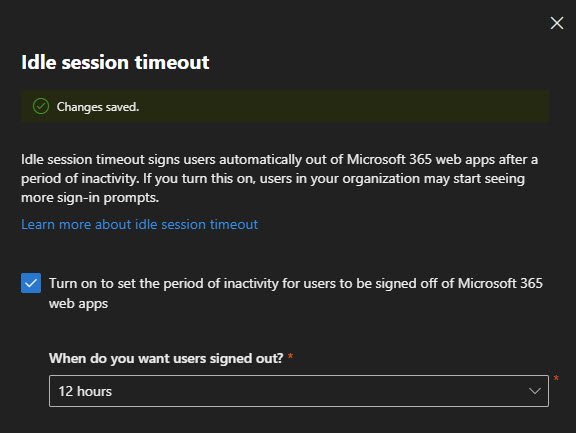
Idle Session Timeout
I enabled idle session timeout and set it to 12 hours which signs off users out of Microsoft 365 web apps after a period of inactivity.
The balance here is security versus convenience, 12 hours means users won’t get logged out during a normal workday, but an unattended machine overnight will require re-authentication.
Adjust this based on your environment, high-security environments might want 1-4 hours, but for a small business 12 hours is reasonable.
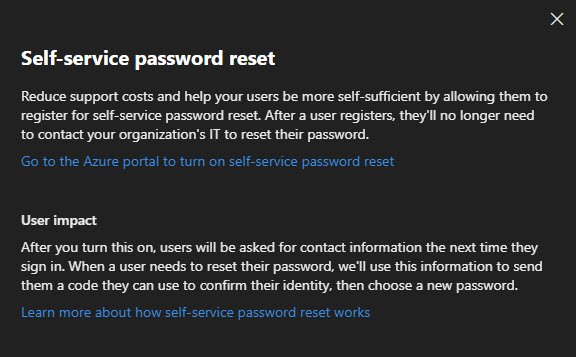
Self-Service Password Reset
SSPR lets users reset their own passwords without calling IT.
This is configured in the Entra ID portal, the link takes you directly there.
Note: I’ll cover SSPR setup in a later post when we configure Entra ID settings.
Block self-service trials and purchases
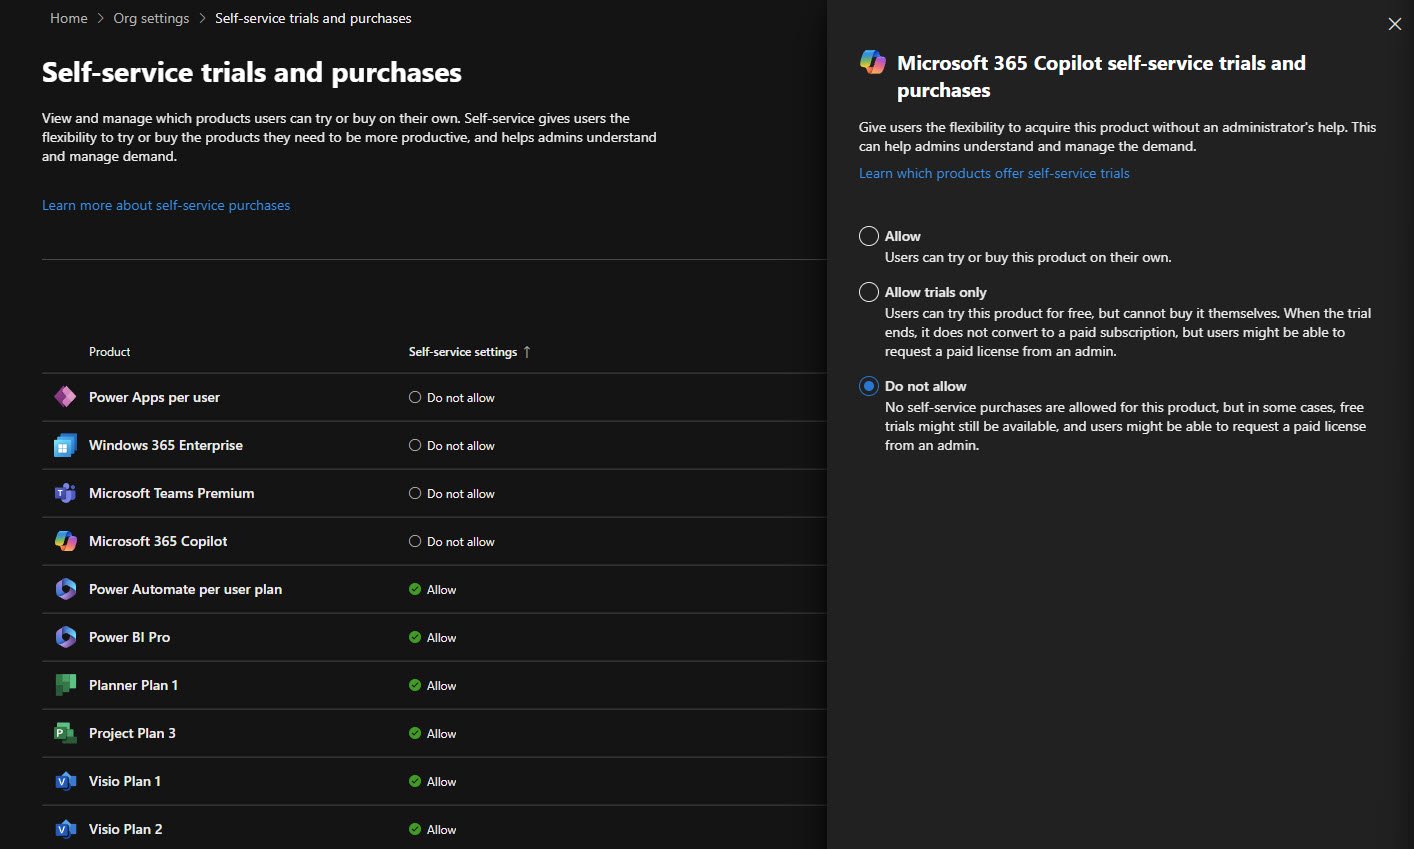
Settings > Org settings, select “Self-service trials and purchases” in order to prevent users from purchasing products without admin consent
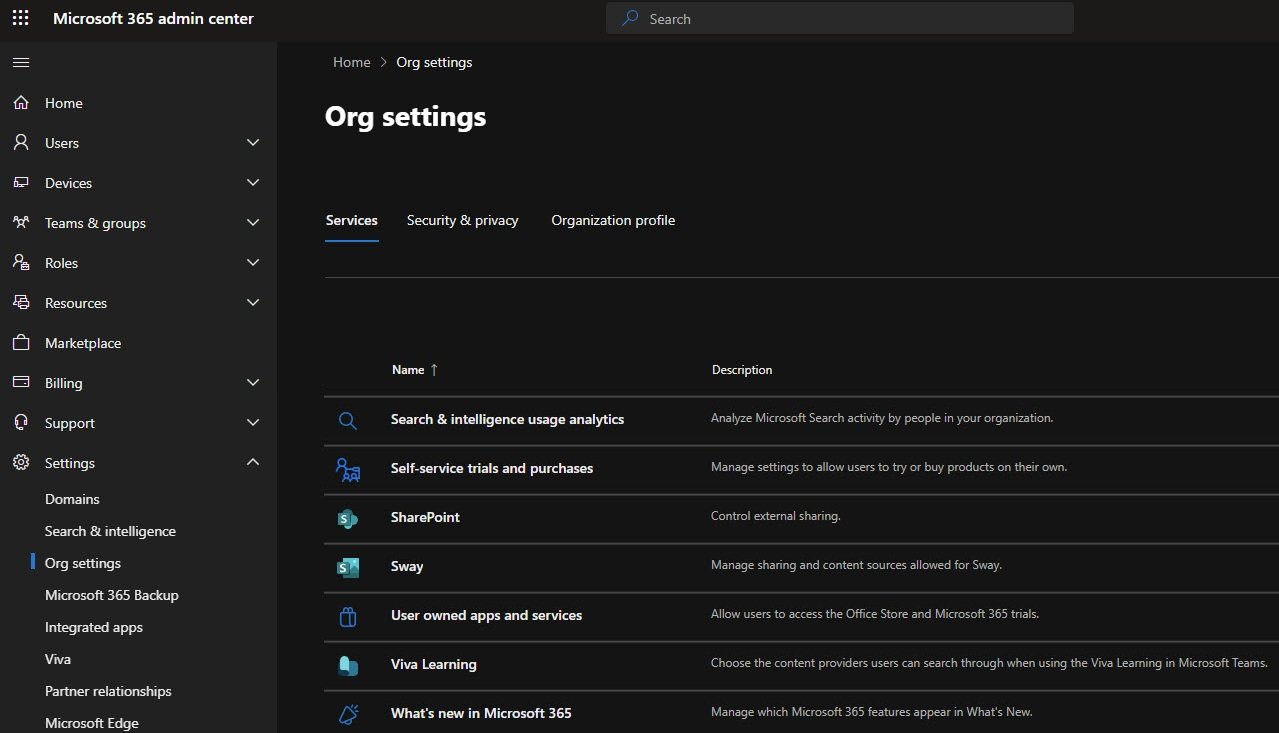
Select the product, for example “Microsoft 365 Copilot” and change it from Allow (default) to Do not allow thus you prevent regular user from making purchases by themselves:
Note: In order to block self-service trials and purchases for all products at once you need to use the following PS commands:
Install-Module -Name MSCommerce

Connect-MSCommerce

$enabledProductPolicies = Get-MSCommerceProductPolicies -PolicyId AllowSelfServicePurchase | Where-Object { $_.PolicyValue -eq "Enabled" }

if ($null -eq $enabledProductPolicies) {
	  Write-Host "No policies are enabled." -ForegroundColor Yellow
    return
}

foreach ($policy in $enabledProductPolicies) {
    $null = Update-MSCommerceProductPolicy -PolicyId AllowSelfServicePurchase -ProductId $policy.ProductId -Value "Disabled"
    Write-Host "The policy for $($policy.ProductName) has been set to disabled." -ForegroundColor Green
}
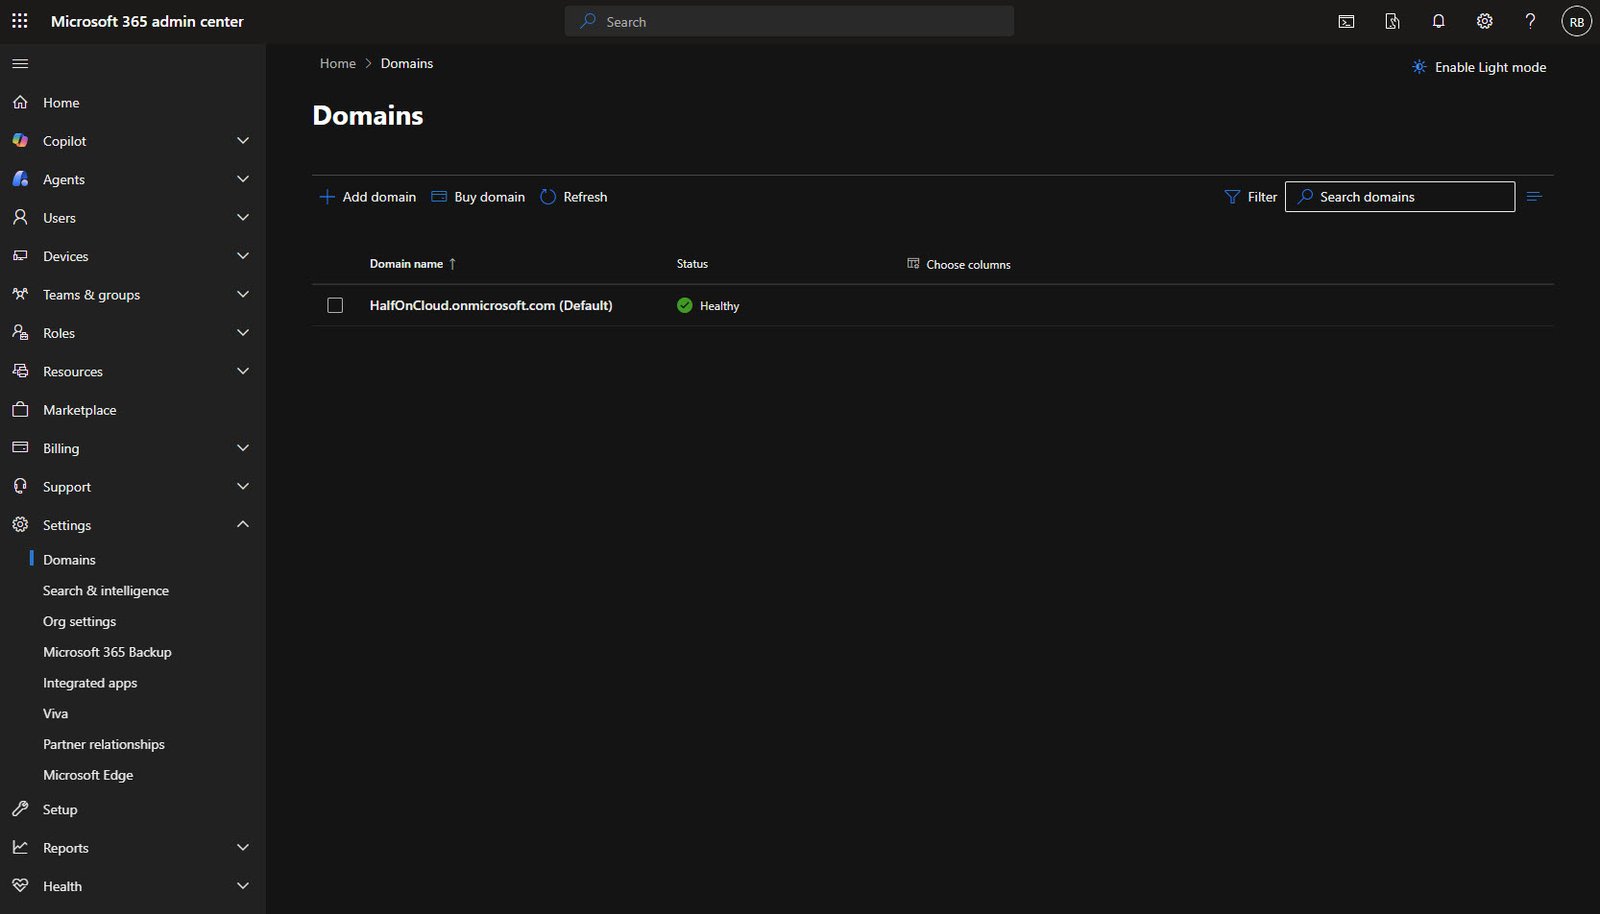
Domains
A quick look at the Domains section, right now I only have the default HalfOnCloud.onmicrosoft.com domain, which Microsoft creates automatically.
In a real deployment you’d add your company’s custom domain here, this involves adding DNS records to verify ownership.
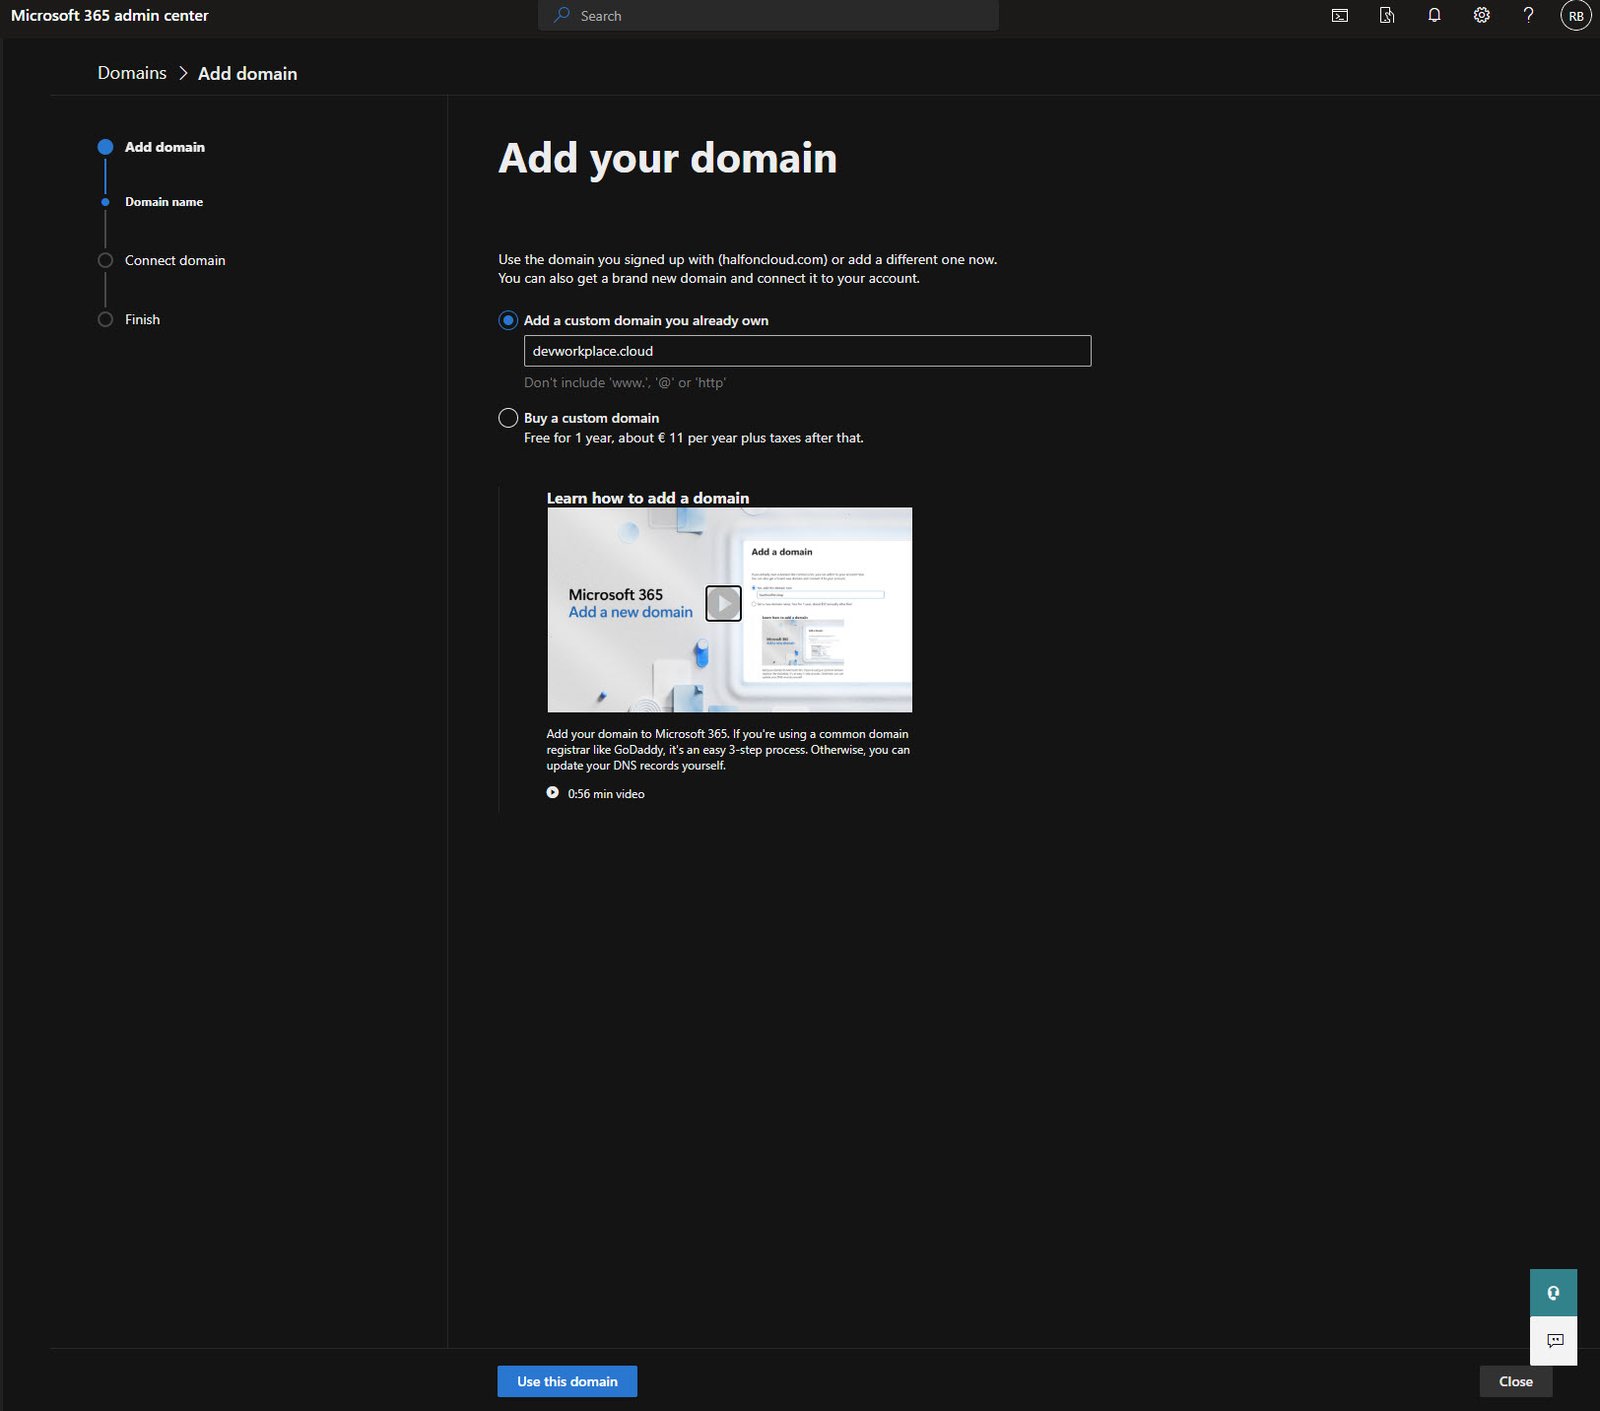
Adding a Custom Domain
Time to add a real domain, for my tenant I’ve acquired a separate new domain called “devworkplace.cloud”
Using the default onmicrosoft.com address works too but it looks unprofessional for an email so I’m adding devworkplace.cloud as my custom domain.
Add a custom domain you already own and enter your domain name (without www or http)
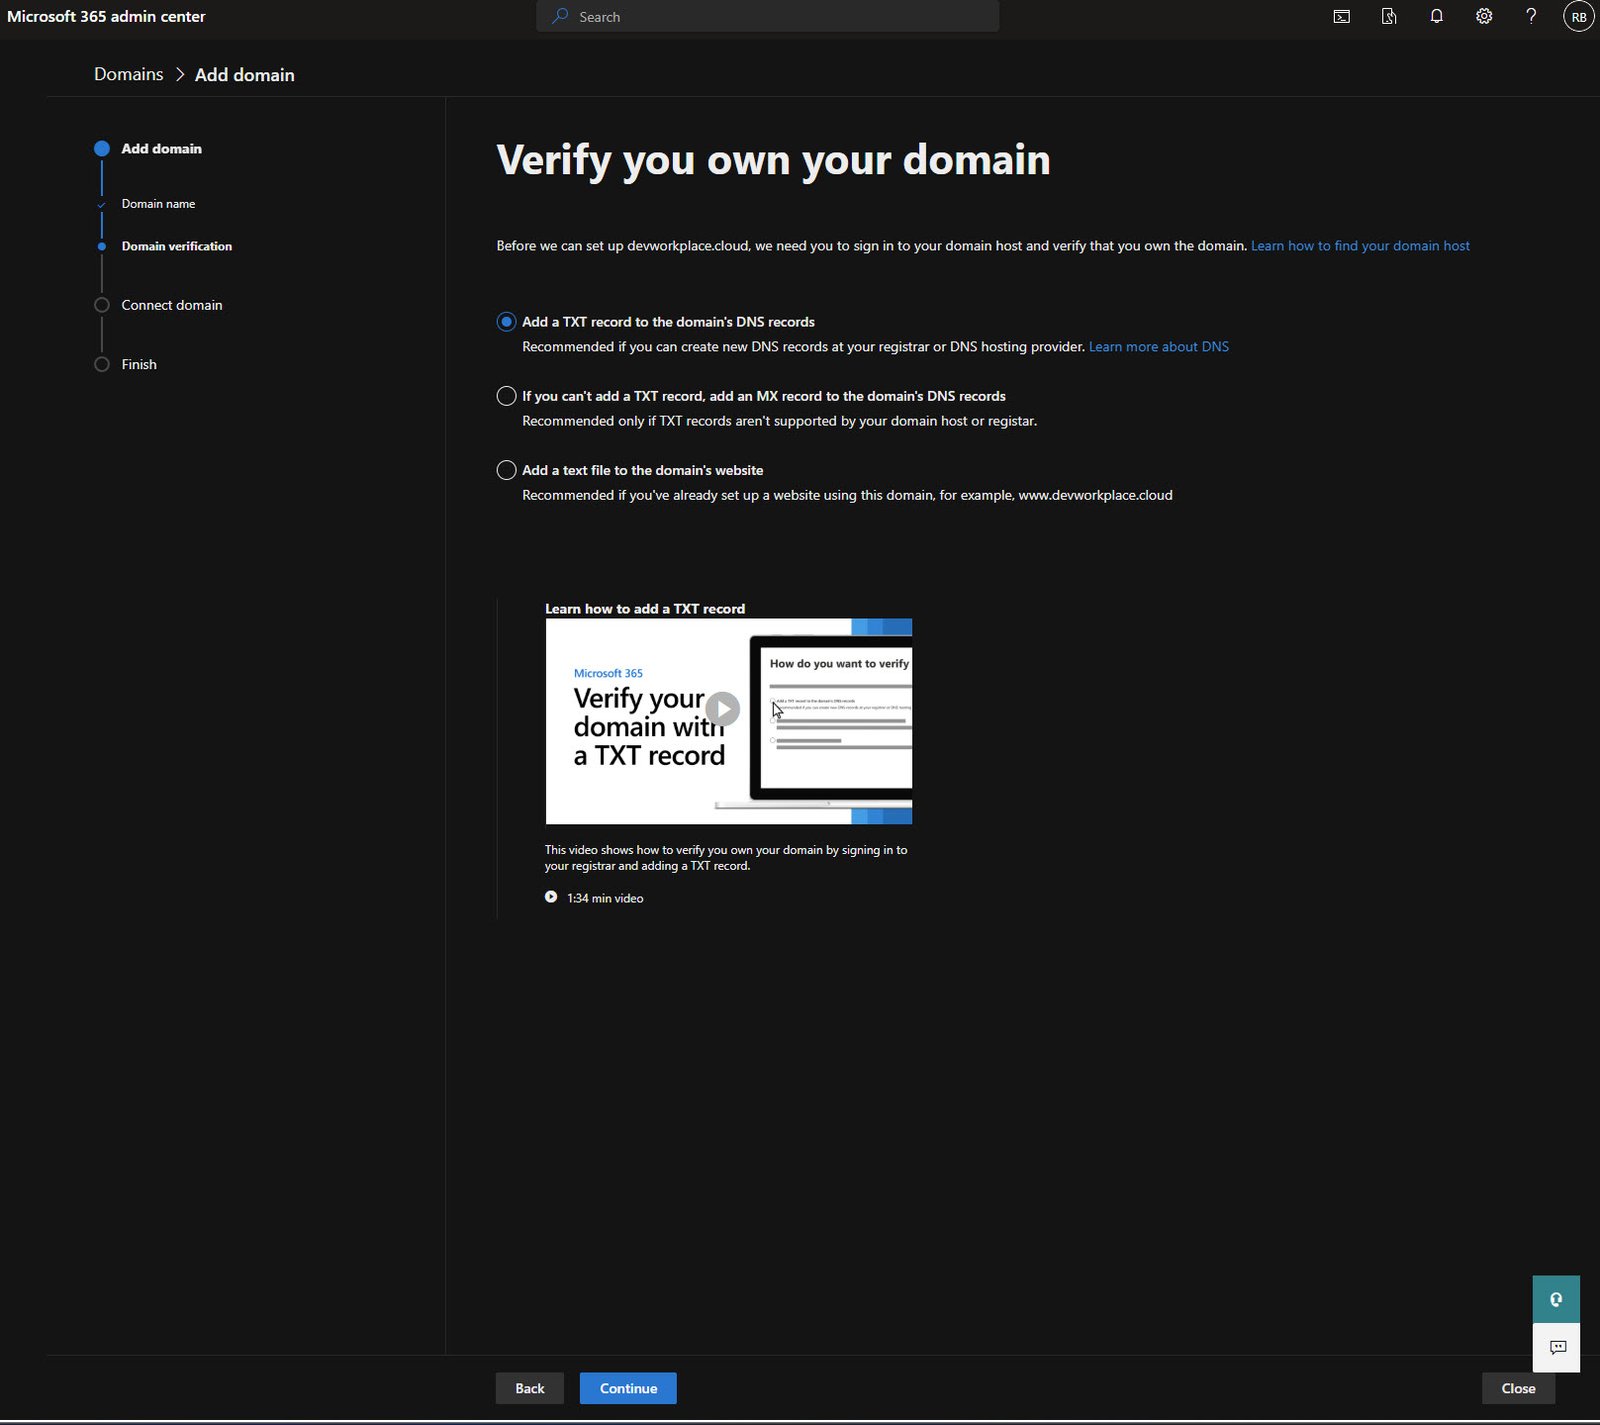
Domain Verification Options
Microsoft needs to verify you actually own this domain, the recommended method is adding a TXT record to your DNS.
There are other options if your registrar doesn’t support TXT records, but TXT is the cleanest approach.
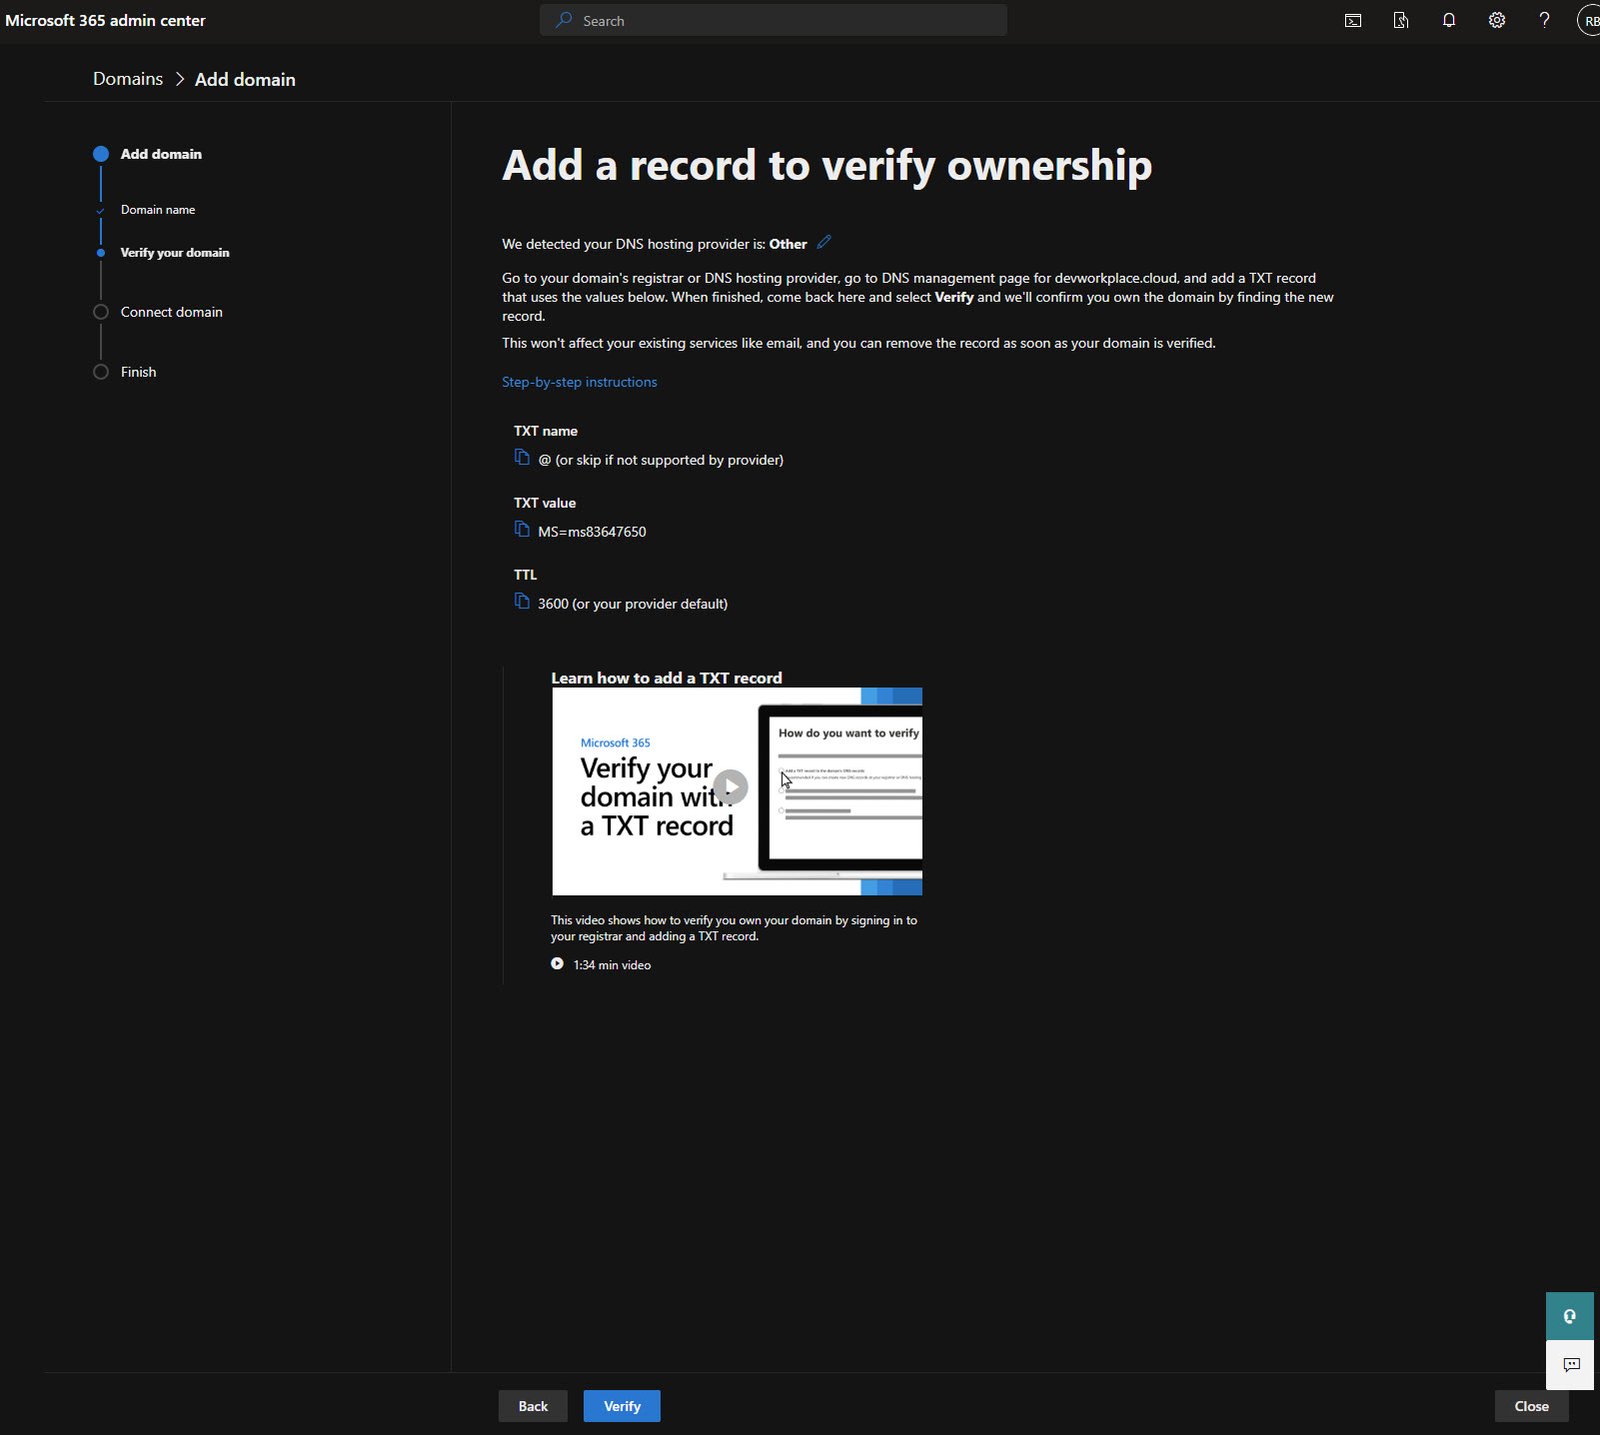
The TXT Record Details
Microsoft gives you the exact values to add. In my case:
- TXT name: @ (or leave blank depending on your registrar)
- TXT value: MS=ms83647650
- TTL: 3600
Copy these values exactly and please note that the MS= code is unique to your tenant!
Adding the TXT Record at Your Host Provider
Now switch to your domain registrar, find the DNS zone editor and add a new TXT record with the values Microsoft provided above.
Select your custom domain and Edit the DNS zone:
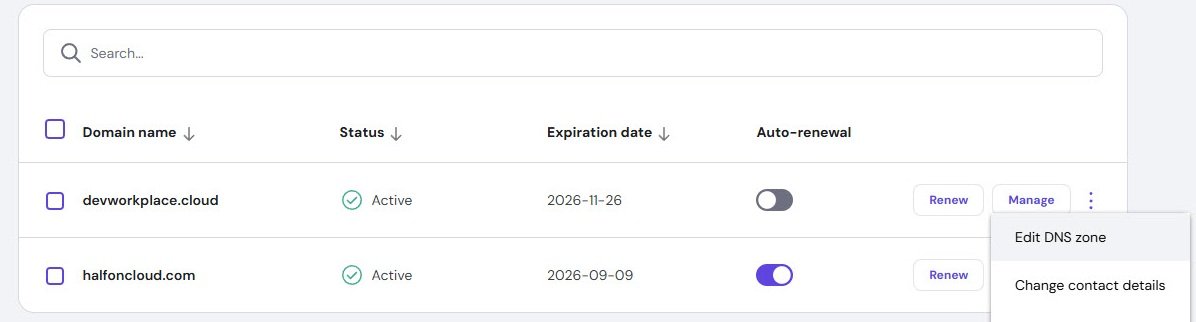
Here’s what it looks like in domain registrar DNS management:
Type is TXT, name is @, value is the MS= string from Microsoft and TTL is 3600

Domain Verified - Connection Options
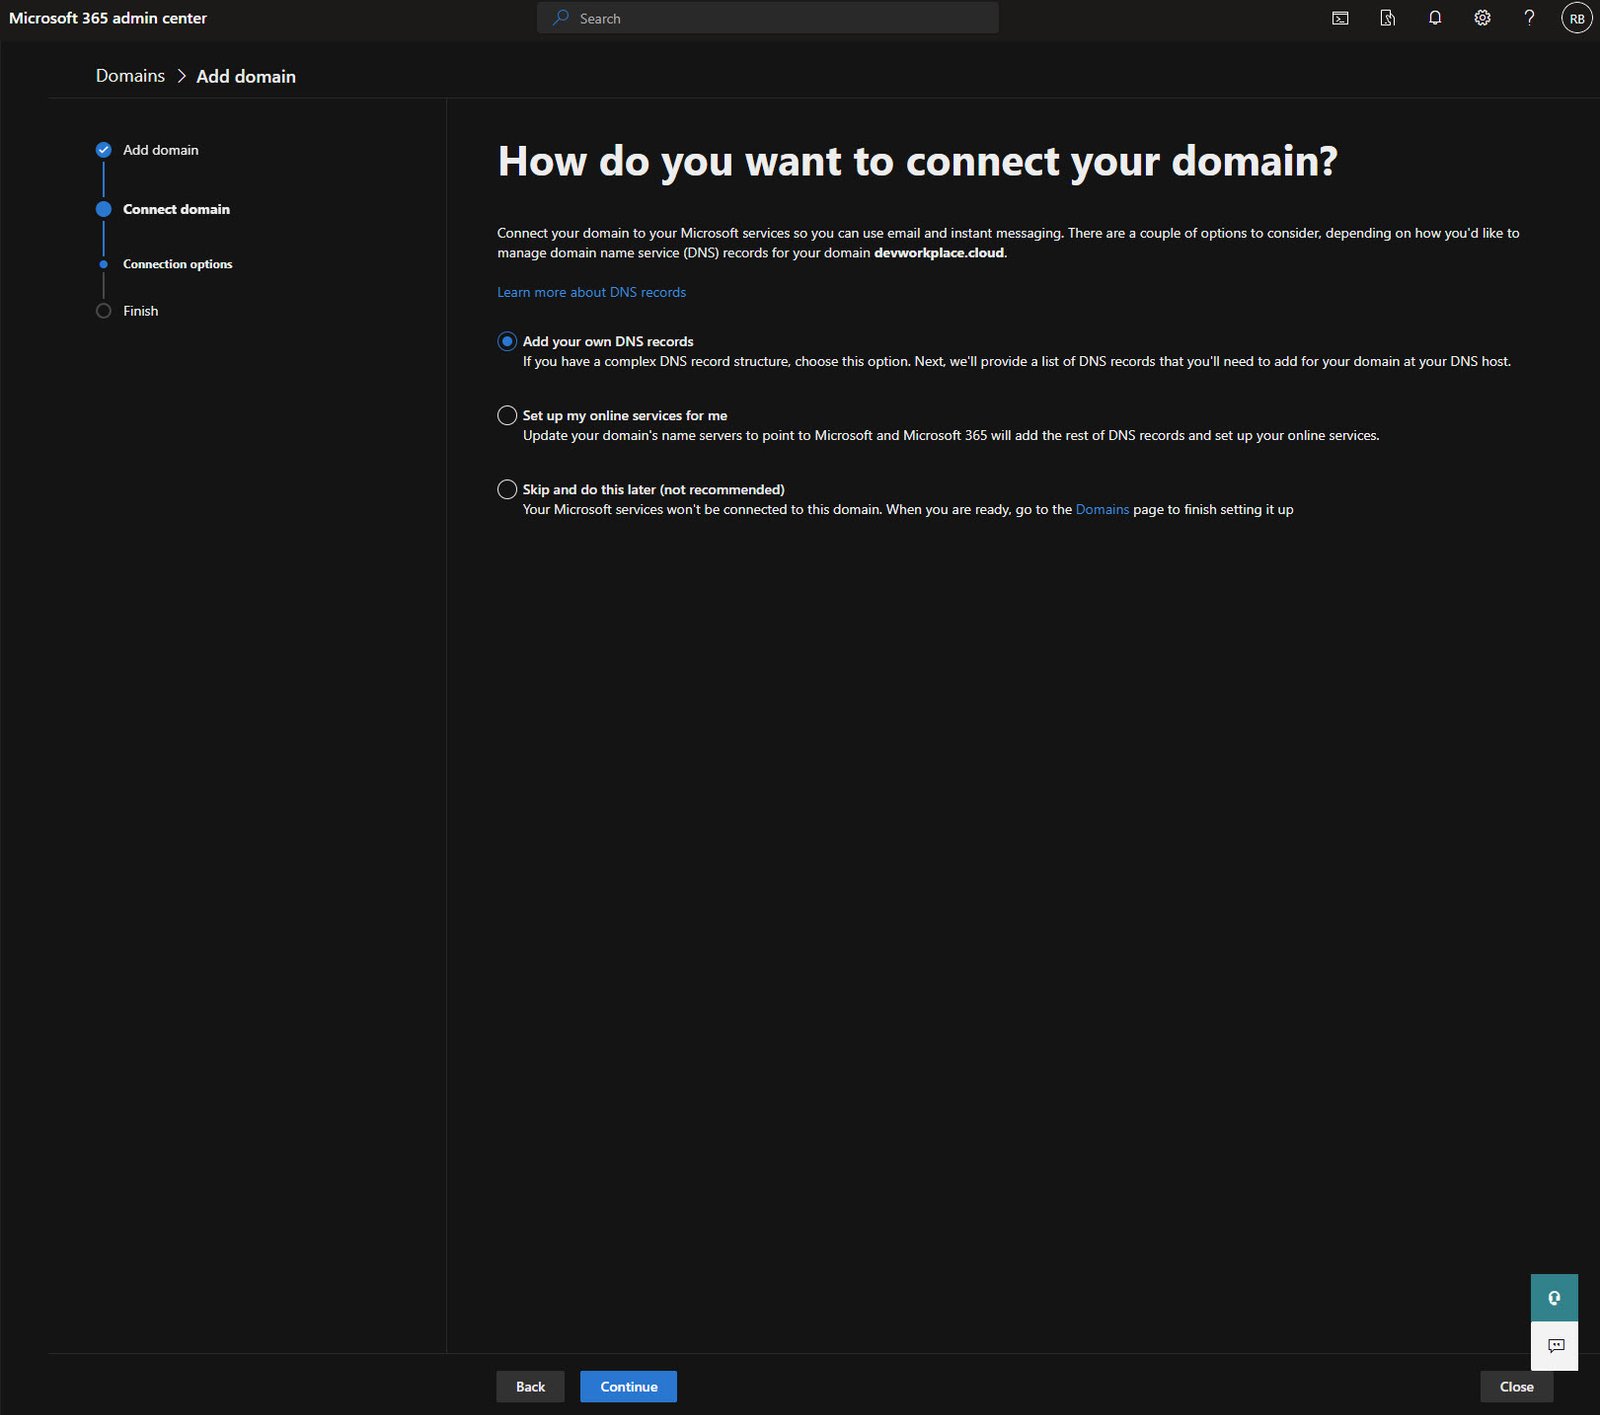
Once Microsoft verifies the TXT record, you move to the connection phase. This is where you decide how to set up DNS for Microsoft services.
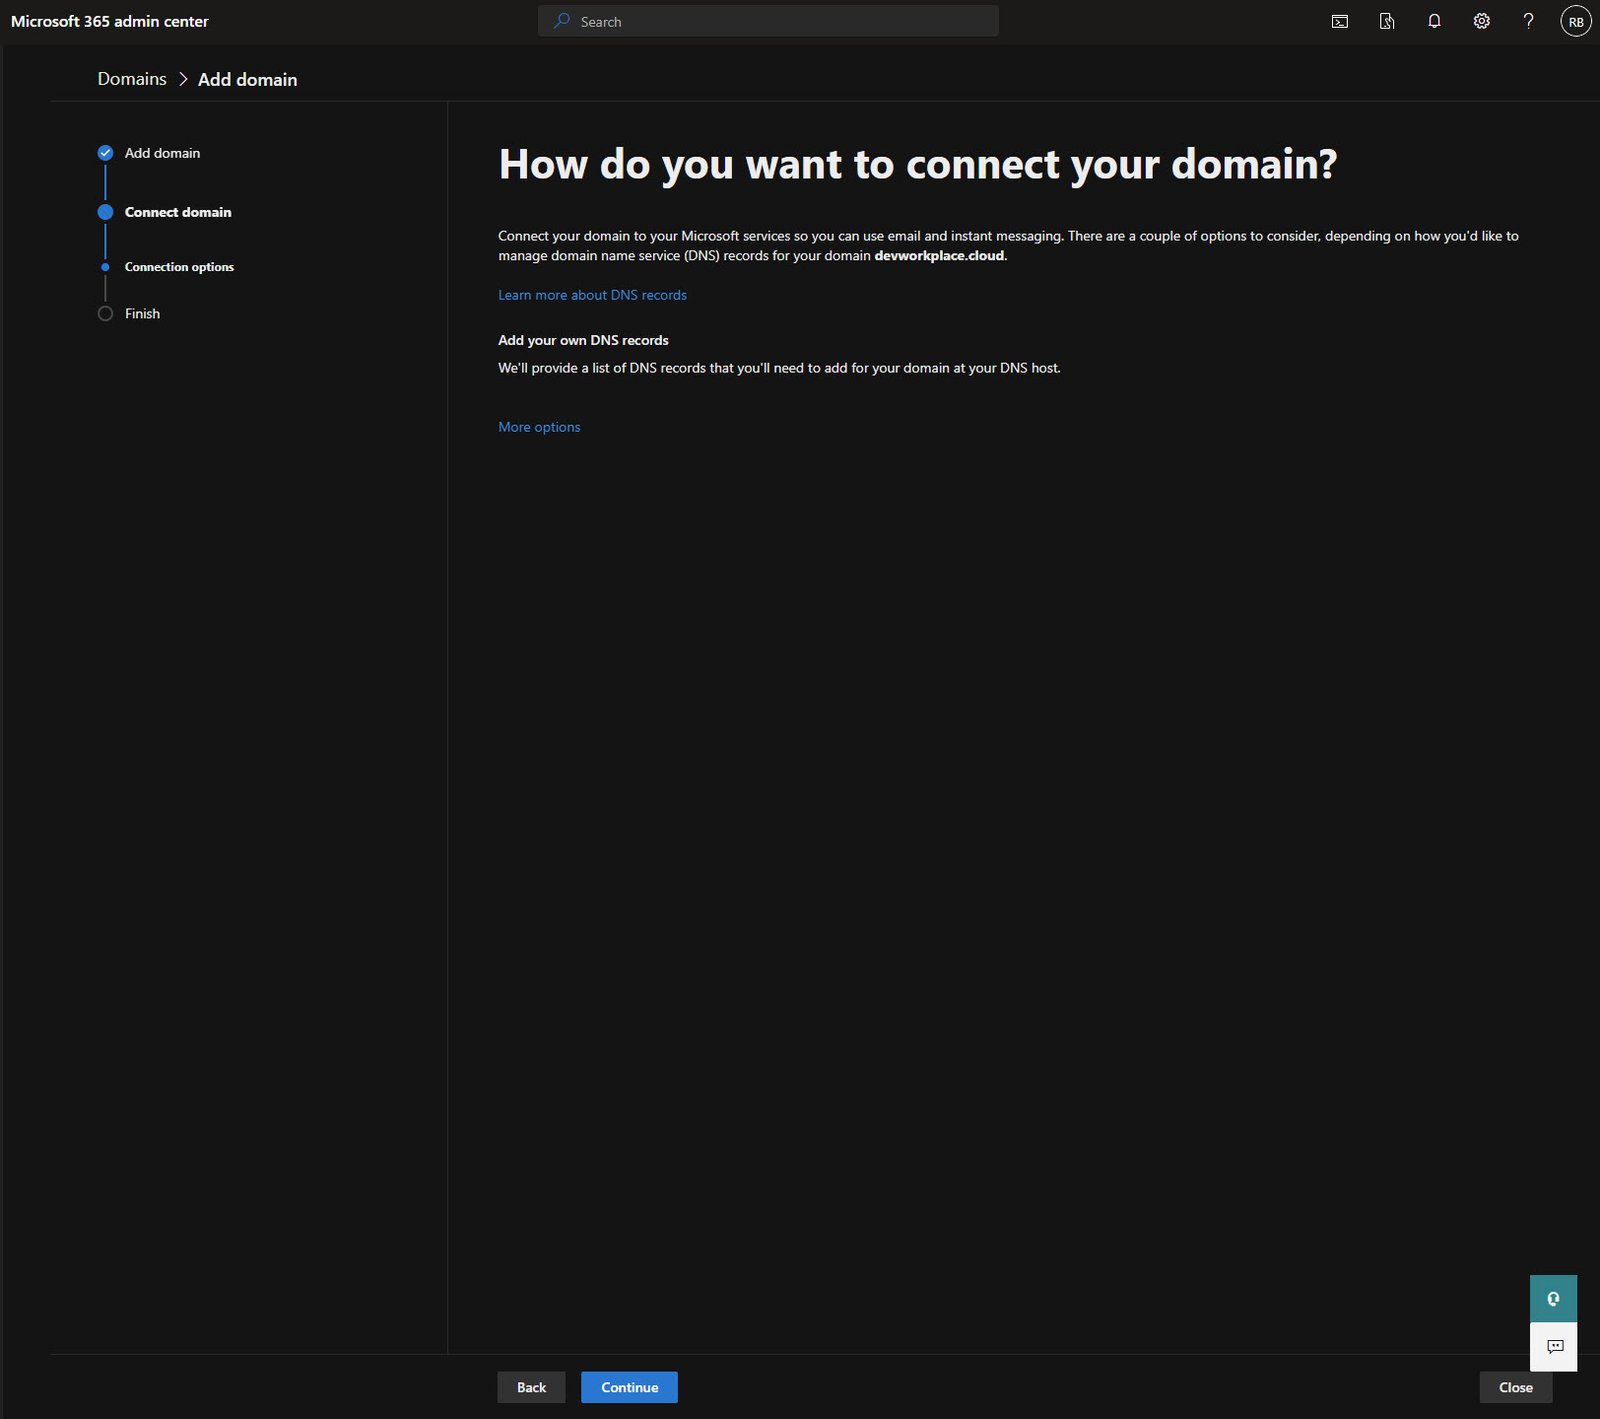
I chose “Add your own DNS records” because I want full control over my DNS configuration.
The other option lets Microsoft manage everything, but that means pointing your nameservers to Microsoft which I don’t want for a domain that also hosts a website.
Required DNS Records for Exchange
Here’s where it gets detailed, Microsoft lists all the DNS records needed for email to work properly.
For Exchange Online, you need the following three records:
- MX record: Routes incoming email to Microsoft
- CNAME record: autodiscover for email client configuration
- TXT record: SPF record to prevent email spoofing
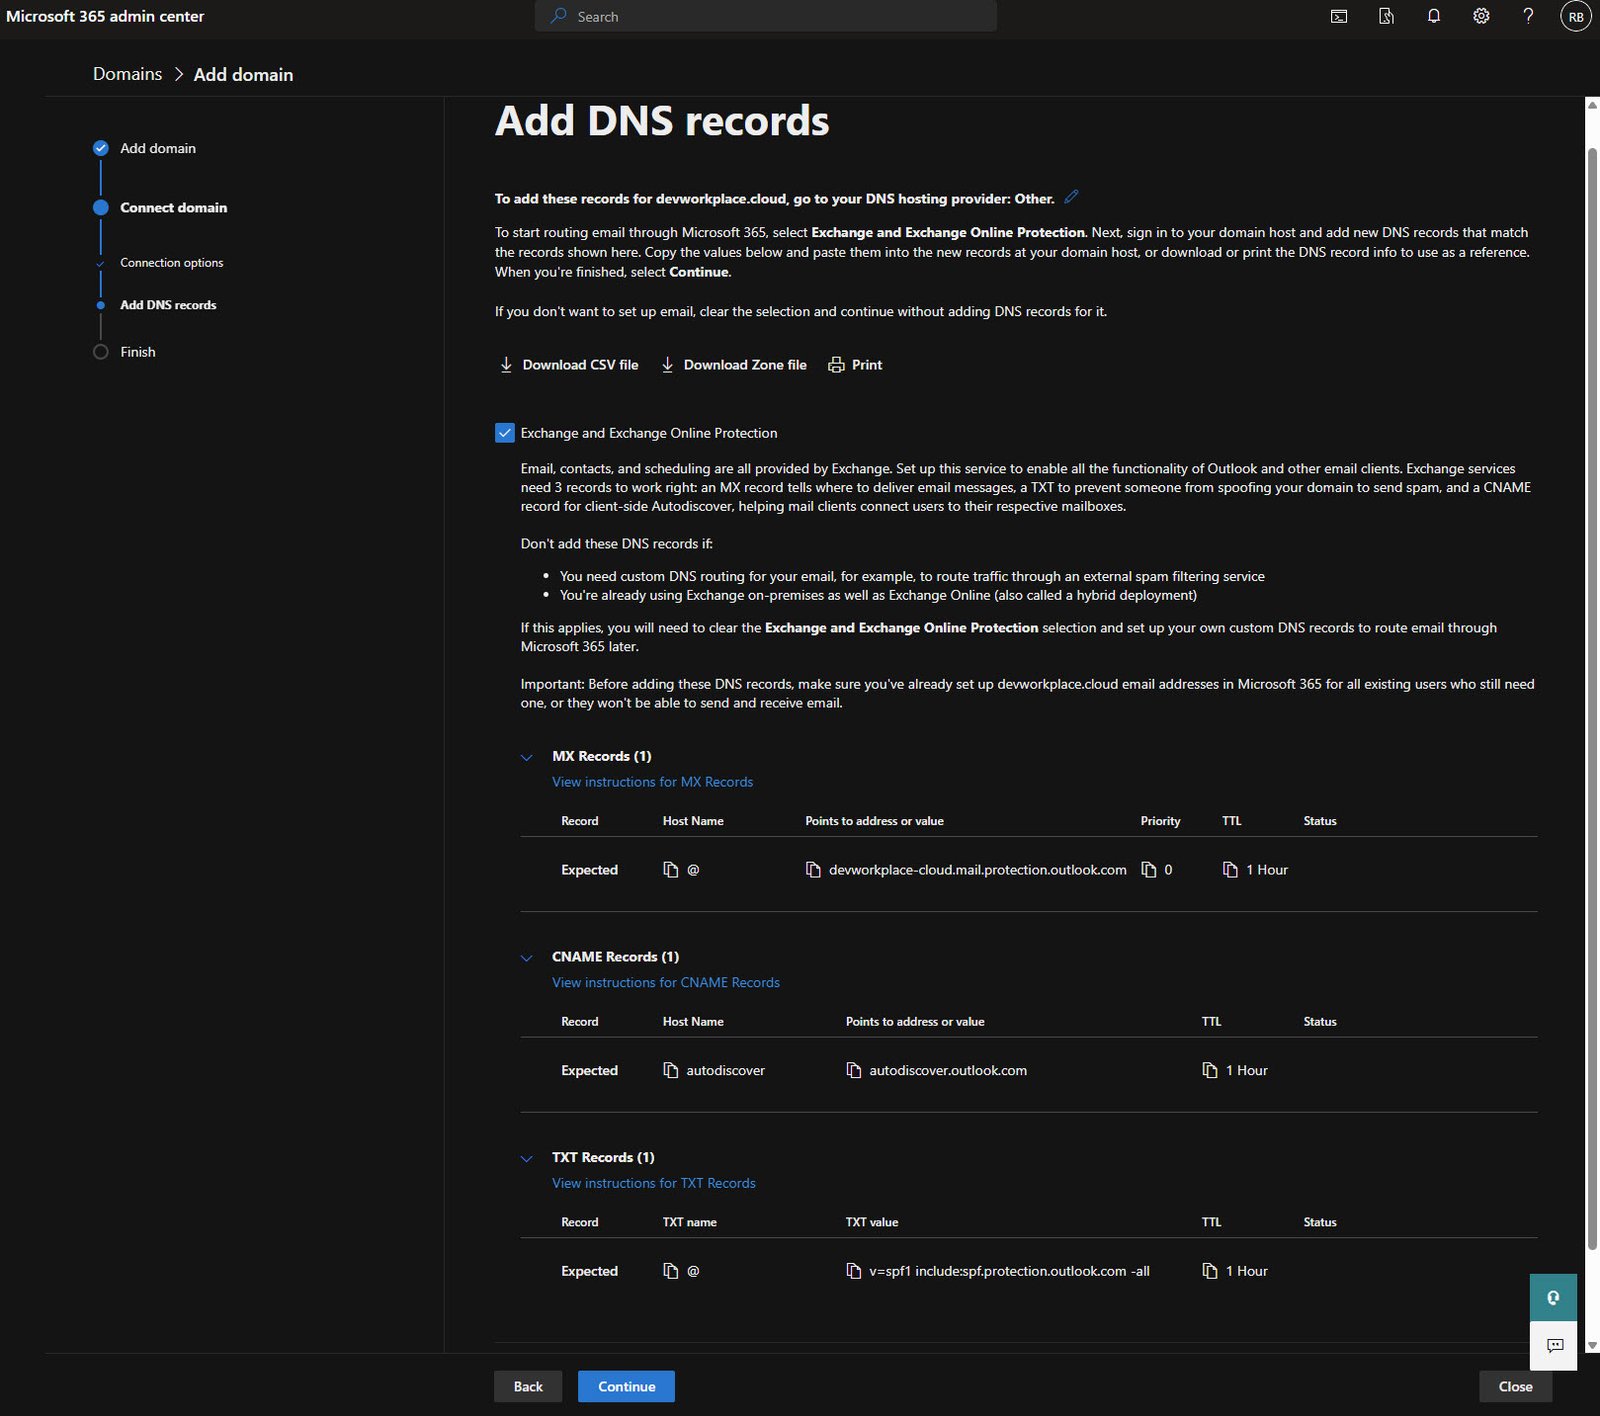
Adding the MX Record
Back in the domain registrar, add an MX record pointing to Microsoft’s mail servers.
The value is devworkplace-cloud.mail.protection.outlook.com with priority 0 and TTL 3600:

Adding the Autodiscover CNAME
The autodiscover CNAME helps email clients like Outlook automatically find the correct server settings. Name is “autodiscover”, target is “autodiscover.outlook.com” and TTL 3600:

Adding the SPF Record
SPF tells receiving mail servers that Microsoft is authorized to send email on behalf of your domain.
This is critical for email deliverability, without it your emails might land in spam folders!
The value is: “v=spf1 include:spf.protection.outlook.com -all” and TTL 3600:

Advanced Options - Intune and DKIM
If you’re planning to use Intune for device management (which we are), check “Intune and Mobile Device Management for Microsoft 365”.
This adds two more CNAME records.

I’ve also enabled DKIM (DomainKeys Identified Mail) which adds email signing for better deliverability and security.
DKIM requires two additional CNAME records.
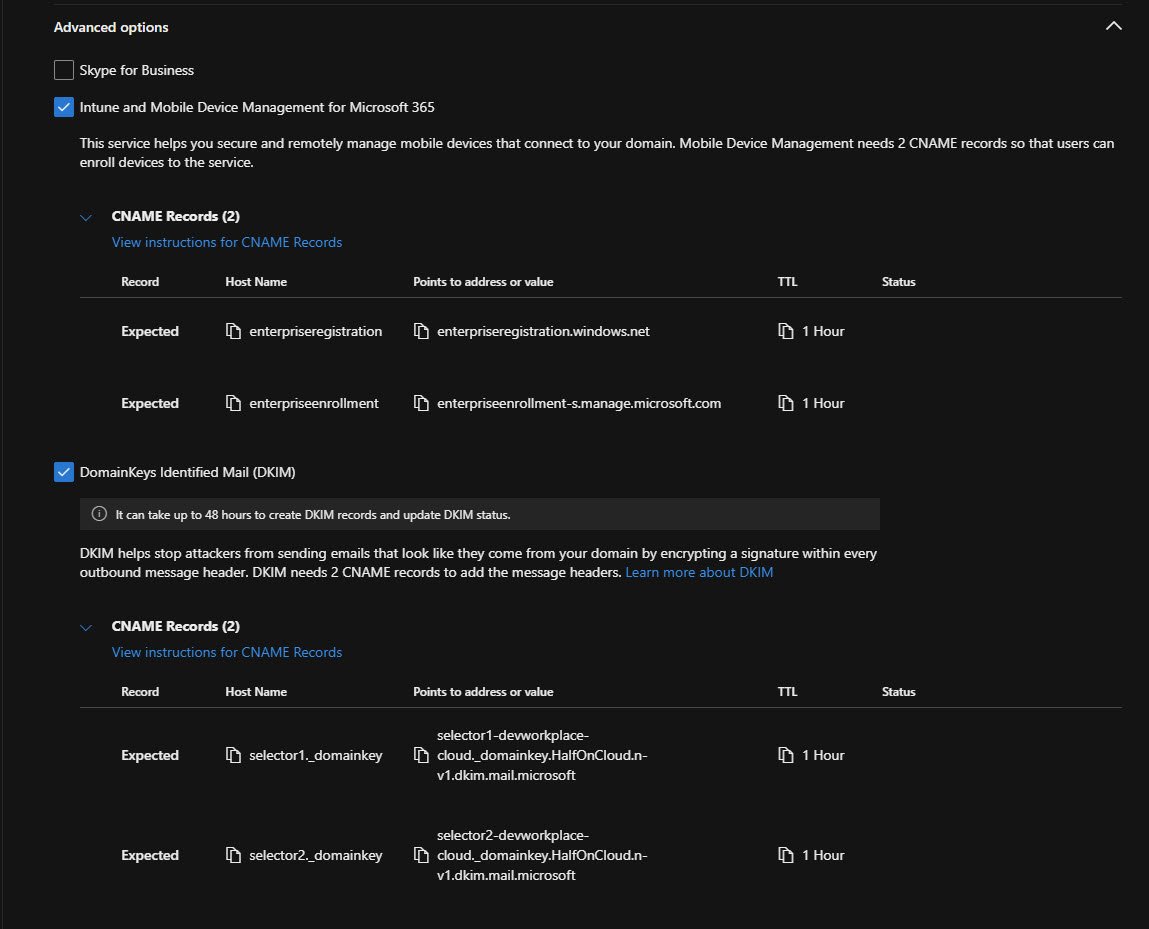
Intune CNAME Records
For Intune device enrollment to work with your custom domain, add these two CNAME records:
- enterpriseregistration: enterpriseregistration.windows.net
- enterpriseenrollment: enterpriseenrollment-s.manage.microsoft.com
These allow devices to automatically discover your Intune tenant during enrollment.


DKIM CNAME Records
DKIM records are longer and look messy, but they’re important. You need two selector records that point to Microsoft’s DKIM signing infrastructure.
The names are:
- selector1-devworkplace-cloud._domainkey.HalfOnCloud.n-v1.dkim.mail.microsoft
- selector2-devworkplace-cloud._domainkey.HalfOnCloud.n-v1.dkim.mail.microsoft
Note: Be aware that these values are unique to your tenant!


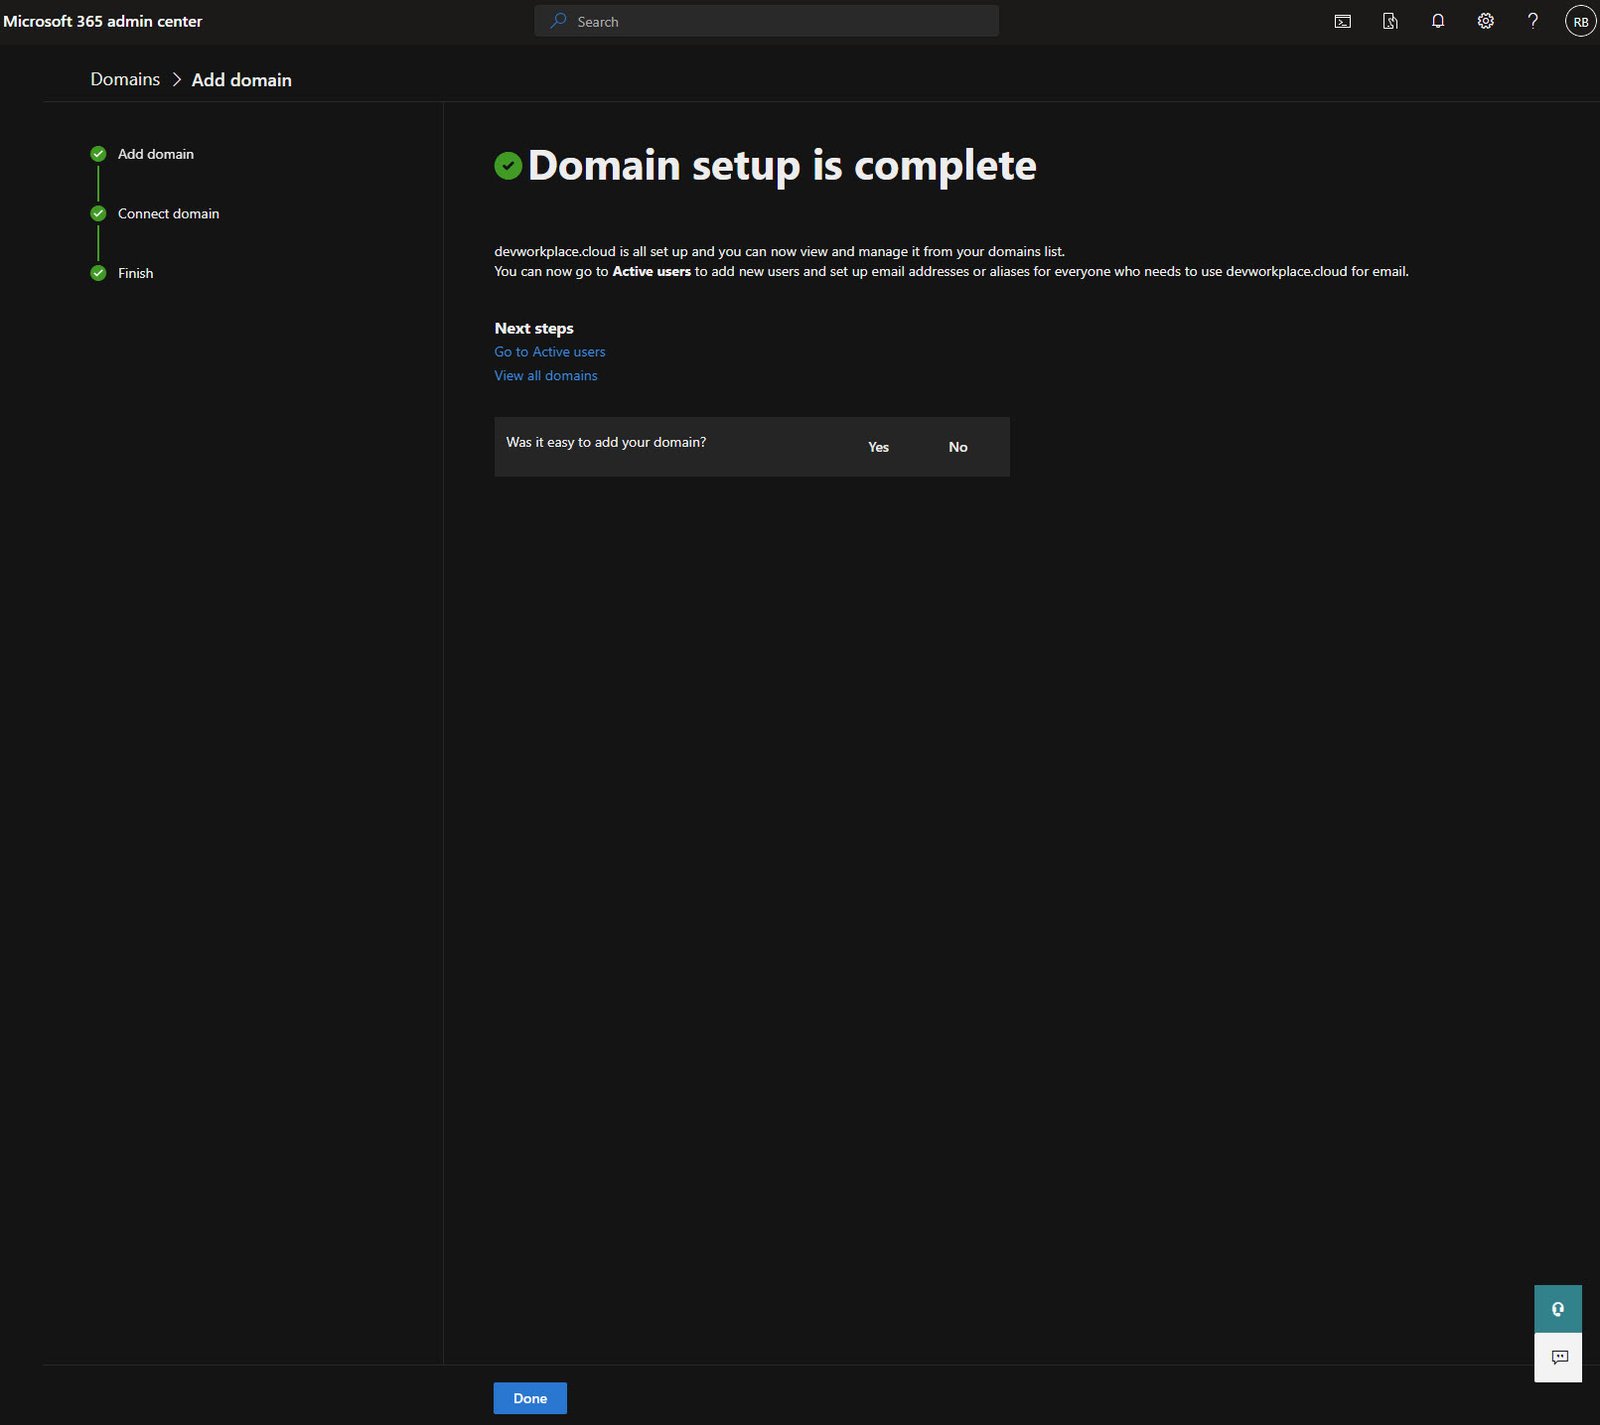
Domain Setup Complete
After adding all the DNS records and giving them time to propagate (usually a few minutes, sometimes up to an hour), Microsoft verifies everything and marks the domain as complete.
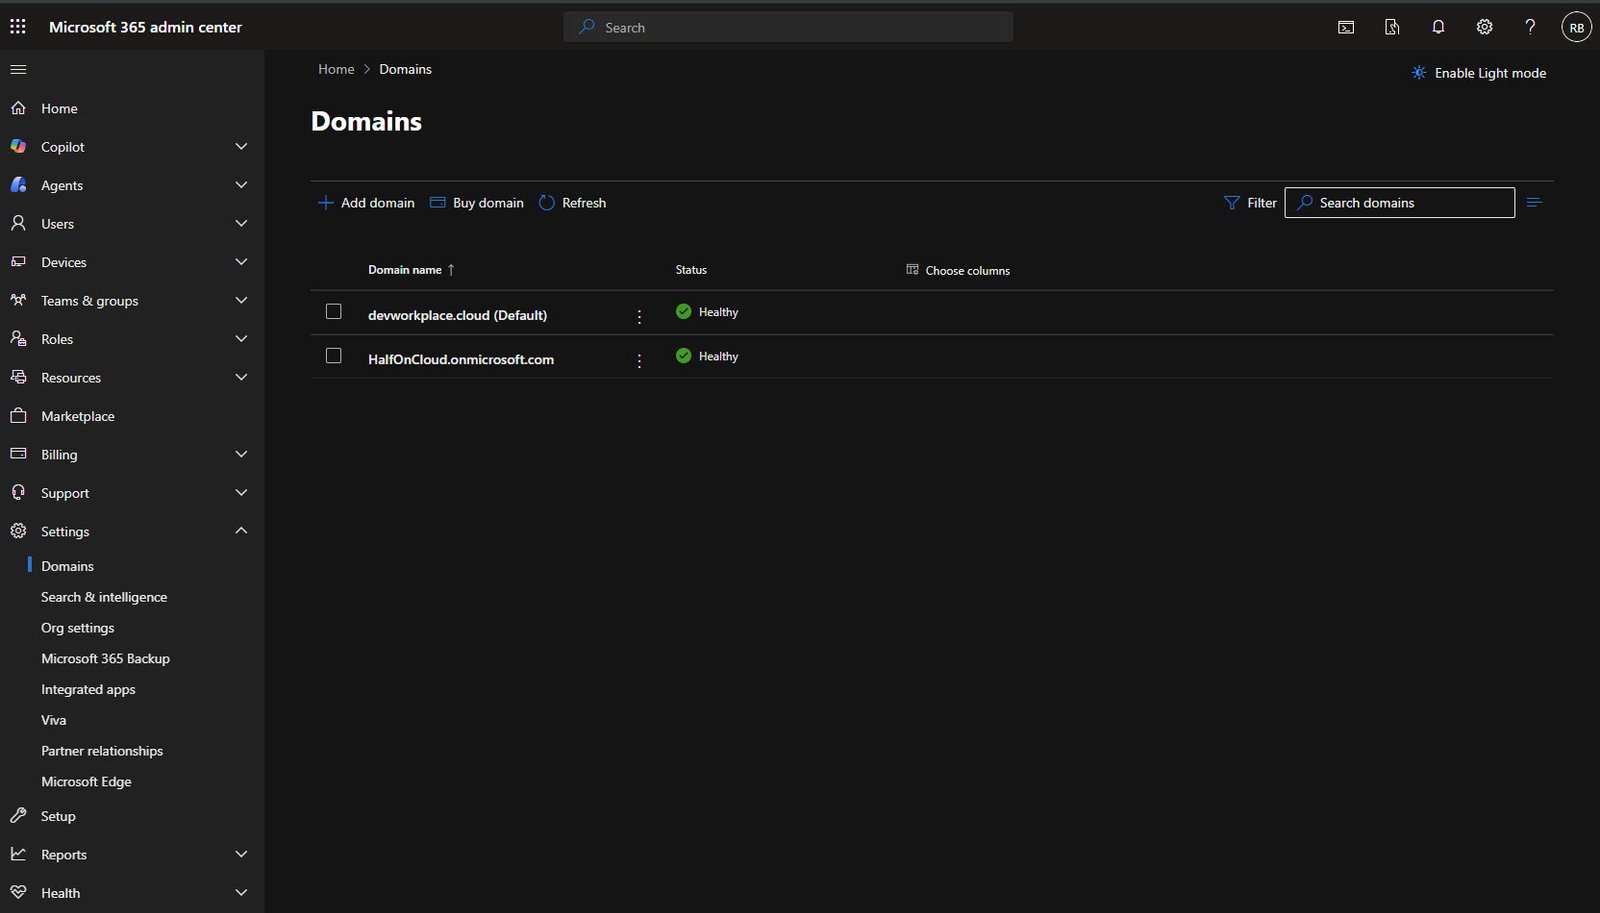
Final Domain Configuration
Back in the Domains list, you now see your custom domain alongside the original onmicrosoft.com domain.
I’ve set devworkplace.cloud as the default, which means new users will automatically get email addresses @devworkplace.cloud instead of @HalfOnCloud.onmicrosoft.com.
Both domains show as Healthy, which means all DNS records are correctly configured!
With the custom domain configured, the tenant is now properly set up for professional use.
Users can have email addresses like < UserName >@devworkplace.cloud instead of the long onmicrosoft.com addresses.